Local business schema helps search engines understand who you are, what you do, and where your business is located. When it is implemented correctly, it supports local search visibility and helps Google connect your website with accurate business information across the web.
In many cases, your SEO plugin already adds this schema automatically. However, there are situations where you may want more control over how that information is structured or displayed, especially on custom or lightweight sites.
This guide explains what local business schema is, why it matters, and when it makes sense to add it manually instead of relying on a plugin.
What Is Local Business Schema
Local business schema is a type of structured data written in a format that search engines can easily read. It communicates essential business details such as your name, address, phone number, hours of operation, and website.
This code does not change how your website looks. Visitors never see it. Its purpose is to help search engines understand your business more clearly and confidently associate your website with local search results and map listings.
Why Schema Markup Matters for Local SEO
Local business schema is not a shortcut to higher rankings, but it plays an important supporting role in local SEO. It reinforces the accuracy of your business information and helps search engines confirm that your website, Google Business Profile, and directory listings all refer to the same real-world business.
For service businesses and physical locations, this consistency is foundational. Even a well-designed website can struggle in local search if business details are unclear or inconsistent.
Should You Use Your SEO Plugin or Add Schema Manually?
For most local business websites, using an SEO plugin to handle local business schema is completely fine and often the best option.
Modern SEO plugins typically generate valid schema automatically based on the information you enter in their settings.
This approach reduces the risk of errors, keeps everything centralized, and makes updates easier over time.
If your plugin is already outputting accurate local business schema, there is usually no additional SEO benefit to adding it manually.
There are situations where manual schema makes sense, but they are more specific.
Some site owners prefer full control over exactly what structured data is output and where it appears. Others run lightweight or custom-built websites that do not rely on large SEO plugins. In those cases, adding schema manually can keep the site simpler while still providing search engines with the information they need.
Manual schema can also be useful when an SEO plugin produces overly generic markup or limits how certain details are handled, such as service areas, business categories, or hours.
From a search engine perspective, there is no inherent ranking advantage to manual schema versus plugin-generated schema. What matters is that the data is accurate, consistent, and valid.
The takeaway is simple. If your SEO plugin is already generating correct local business schema, leave it alone. If it is not, or if you are not using an SEO plugin at all, manual JSON-LD is a reliable alternative.
How to Add Local Business Schema Manually
If your site does not already include local business schema, the recommended approach is to use JSON-LD. Google supports this format and allows it to be placed anywhere in the page HTML, including the head section.
You should only add one primary local business schema per physical location. If your business operates from multiple locations, each location should have its own page and its own schema markup that matches that address.
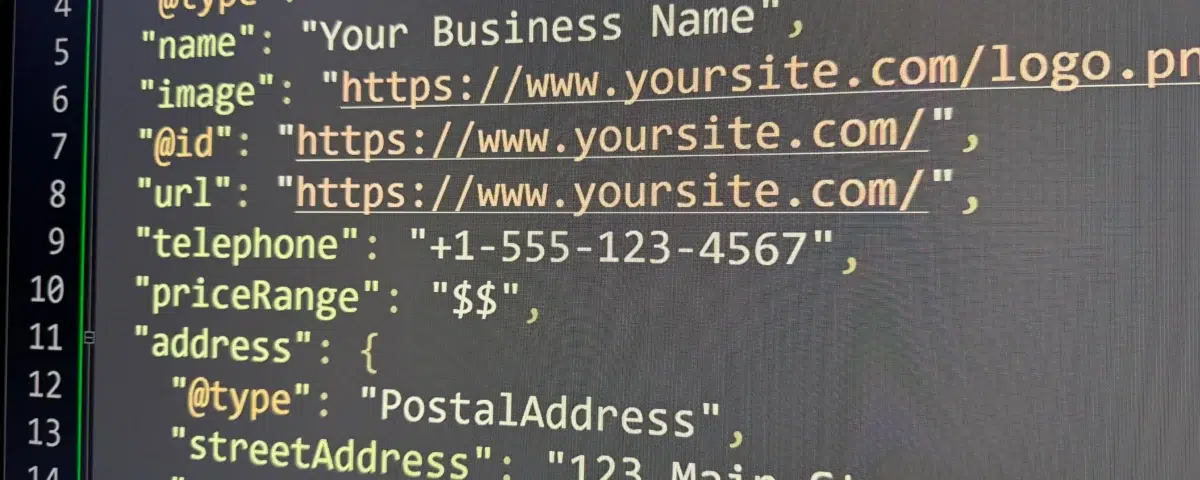
Below is a simple JSON-LD template you can use. Replace the placeholder values with your actual business information.
<script type="application/ld+json">
{
  "@context": "https://schema.org",
  "@type": "LocalBusiness",
  "name": "Your Business Name",
  "image": "https://www.yoursite.com/logo.png",
  "@id": "https://www.yoursite.com/",
  "url": "https://www.yoursite.com/",
  "telephone": "+1-555-123-4567",
  "priceRange": "$$",
  "address": {
    "@type": "PostalAddress",
    "streetAddress": "123 Main Street",
    "addressLocality": "Milwaukee",
    "addressRegion": "WI",
    "postalCode": "53202",
    "addressCountry": "US"
  },
  "geo": {
    "@type": "GeoCoordinates",
    "latitude": 43.0389,
    "longitude": -87.9065
  },
  "openingHoursSpecification": [
    {
      "@type": "OpeningHoursSpecification",
      "dayOfWeek": [
        "Monday",
        "Tuesday",
        "Wednesday",
        "Thursday",
        "Friday"
      ],
      "opens": "09:00",
      "closes": "17:00"
    }
  ],
  "sameAs": [
    "https://www.facebook.com/yourbusiness",
    "https://www.instagram.com/yourbusiness",
    "https://www.linkedin.com/company/yourbusiness"
  ]
}
</script>
How Do You Actually Add This to Your Website?
Once you have your schema filled out, the next question is where it goes. The short answer is that this code needs to be added to your website’s HTML so search engines can read it.
How you do that depends on how your site is built.
If You Are Using WordPress
There are a few safe ways to add this without editing theme files directly.
Use a Code Snippets Plugin
The simplest option is to use a code snippet or header injection tool, our favorite is WPCodeBox, but there are many free versions within the WordPress plugin repository.
Your site might even already have a plugin installed for this purpose. These tools allow you to paste the schema code into the head section of your site without touching your theme.
To do this, you would paste the entire script block exactly as shown into the custom header or site-wide scripts area. Once saved, the schema will load automatically on your site.
Custom HTML Blocks
Another option is to add the code directly to a specific page using a custom HTML block. This works well if the schema is meant to apply only to a single location page rather than the entire site.
The script does not display anything visually, so it is safe to place it anywhere in the page content as long as it is not altered.
If you are comfortable editing theme files, the schema can also be added to the head section of your theme. This approach is less beginner-friendly and should only be done if you understand how theme updates work, since changes can be overwritten.
If You Are Not Using WordPress
For non-WordPress sites, the process is similar but more manual.
The schema script should be added directly into the HTML of the page that represents your business or location. The safest place is inside the head section of the page, but it can also be placed anywhere in the body as long as it remains intact.
If your site uses a website builder or CMS, look for an area that allows you to add custom code or scripts. Most platforms provide a section for this, even if it is labeled differently.
Where Should This Code Live?
The schema should live on the page that best represents your business location. For most businesses, that is either the homepage or a dedicated location page.
If your business has multiple locations, each location should have its own page with schema that matches that specific address. You should not reuse the same local business schema across different location pages.
One Important Reminder Before You Add It
Before adding this manually, double-check that your SEO plugin or site builder is not already generating local business schema for you. Adding duplicate schema can cause conflicts and confusion rather than improvements.
If you are unsure, test your page first using Google’s Rich Results Test. If valid local business schema already appears, you likely do not need to add anything.
Common Issues to Watch For
The most important rule with schema is that it must match what is visible on your site. Your business name, address, phone number, and hours should be consistent across your website, your contact page, and your Google Business Profile.
Avoid adding schema for locations you do not physically operate from. Do not use keyword-stuffed business names, and do not duplicate the same local business schema across multiple pages for a single location. Accuracy and consistency matter more than complexity.
How to Test Your Schema
Once the code is in place, it should always be tested. Google’s Rich Results Test allows you to confirm that the markup is valid and readable. Another good tool to test is the Schema Markup Validator.
Errors should be fixed immediately. Warnings are often acceptable, but they are still worth reviewing to ensure nothing important is missing.
Testing confirms that the data you intended to communicate is actually being interpreted correctly.
When Schema Alone Is Not Enough
Local business schema helps establish clarity, but it cannot compensate for weak on-page SEO, poor location pages, or an unoptimized Google Business Profile.
If a site is struggling in local search, the issue is usually broader than structured data alone. In those cases, improving page content, location relevance, and overall site structure will have a greater impact than adding more markup.
Getting Help When You Need It
If you are unsure whether your site already includes schema, or you want confirmation that everything is implemented correctly, Vertz Marketing helps local businesses audit and improve their technical SEO foundation via an SEO audit.
Sometimes the most effective improvements come from simplifying what is already in place rather than adding something new.